
Our devices have become our go-to cameras, which means we can’t avoid importing our pictures from iPhone to computer forever. If you’re wanting to know how to transfer pictures from your iPhone to your computer, you have lots of options. The classic way to download pictures from your iPhone is to use the photo transfer feature in the built-in Photos app that both Mac and PC offer. You can also import photos from iPhone to Mac wirelessly by using iCloud. Or if you have a recent Mac, you can use AirDrop for an incredibly easy transfer of photos to your computer. Getting photos off your iPhone may be frustrating, but it doesn’t have to be. This article will make transferring your pictures from iPhone or iPad (even the newest devices like the iPhone XS and the iPhone XR) to a Mac or PC a breeze.
Downloading your pictures to a computer without iTunes is easy. Regardless of whether you own a PC or a Mac, your computer will recognize your iPhone as a camera when connected, which makes copying photos to your computer simple. Connecting your iPhone to your computer with a Lightning-to-USB cable is still one of the quickest ways to transfer your photos. There are alternatives such as Dropbox, Google photos, or email that you can check out in other posts we’ve written, but we’ll focus on downloading photos via USB and with iCloud or AirDrop here.
Table of Contents:
How to Transfer Photos from iPhone to Computer (Mac)
Transfer Photos from iPhone to PC
How to Import Photos from iPhone to Mac with iCloud Photo Stream
How to Import Photos Using AirDrop on Mac
How to Transfer Photos from iPhone to Computer (Mac)
- Connect your iPhone to your computer with the USB cable.
The Photos app on your Mac will automatically open. If it doesn’t, open your Applications folder and select the Photos app.
Select File from the top menu, then select Import.
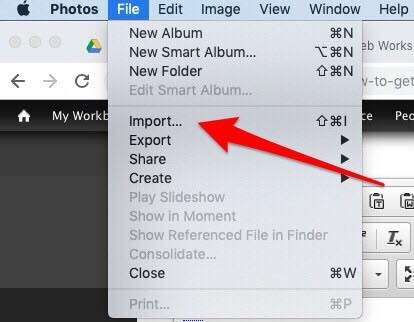
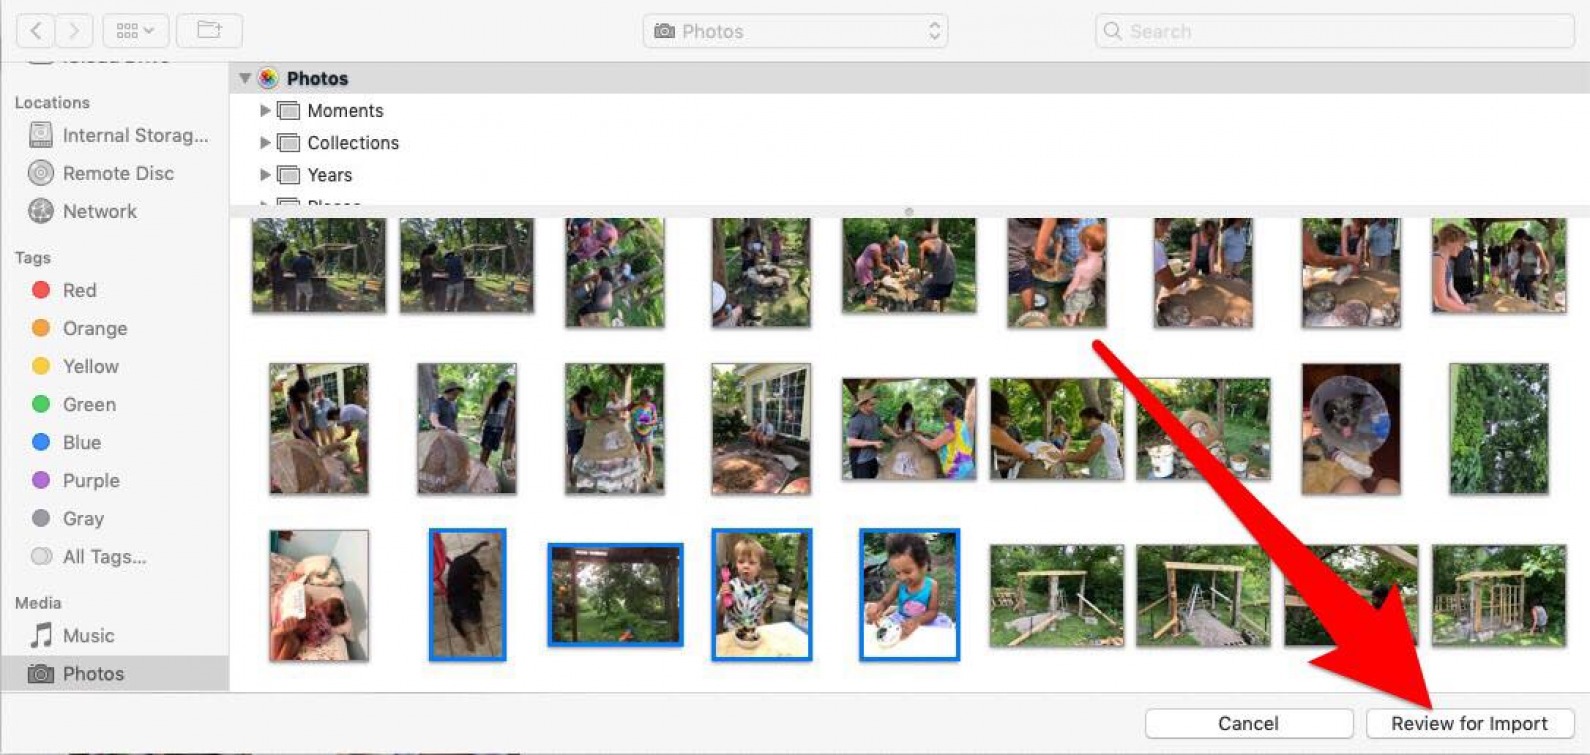
- If you’ve already imported some or all of your selected photos, your Mac will let you know, then give you the option to import the remaining photo(s) by clicking Import New Photo.


To view the recently imported photos, select Last Import on the sidebar. And you’re done.
If you have a PC with an older version of Windows, Auto Play will pop-up when your iPhone is connected to your computer with a USB cable. On a PC with Windows 8, your computer will detect the device and provide a pop-up that says, Tap to choose what happens to this device. When you click on that pop-up, you’ll see the option to Import Photos and Videos. The rest of the process should be pretty similar to what is below. When in doubt, look for the Import button.
We’re going to focus on getting photos onto your computer with Windows 10. Like the Mac, Windows has a Photos app for easy import and organization.
Plug your iPhone into your computer with the USB cable.
The Photos app should automatically launch. If it doesn’t, launch the program using the Windows Start menu or search bar.
Click the Import icon in the upper right corner of the Photos app.


The next pop-up will show you where the photos will be saved and give you the option to change the location. Here, you can also check the box, Delete imported items from (device) after importing.
Click Import.

Once they’re imported, you can view the photos in the Collections menu or select the Album icon on the left sidebar to view specific albums.
We’re going to delve into the two different way to transfer photos with iCloud next: Photo Stream and iCloud Photo Library. There are some important distinctions between the two that we’ll go over; my best recommendation is to enable both.
Photo Stream does not take up any of your iCloud Storage package. However, photos will appear in Photo Stream for only 30 days (we have a solution to this below). Photo Stream also doesn’t upload your videos, but you can view your pictures across your devices easily. For both methods, Photos will automatically transfer when your device is in a Wi-Fi zone unless you have enabled the option to transfer over cellular. To set up Photo Stream, you’ll need to enable it on both your iPhone (or iPad) and computer.
On your iPhone, open the Settings app.
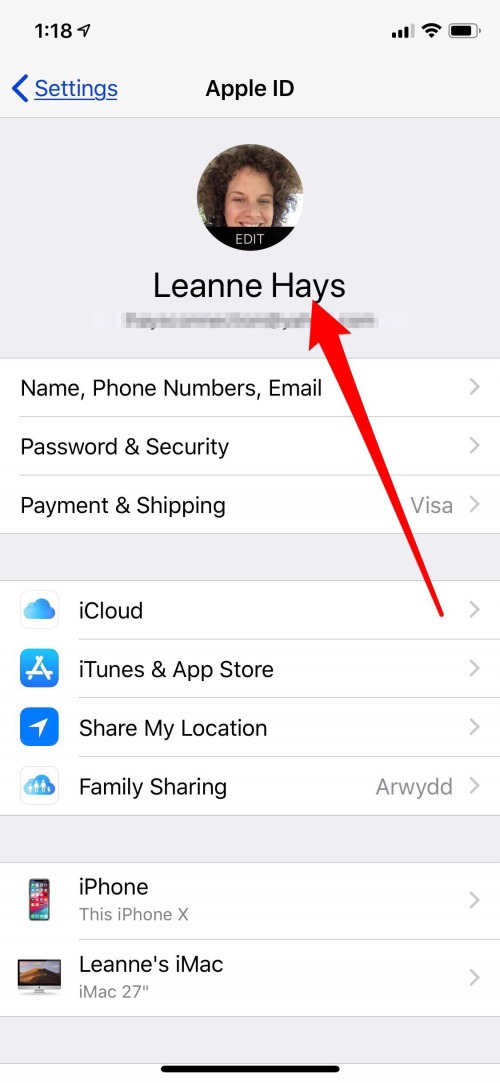
Tap the banner with your name at the top of the Settings page.

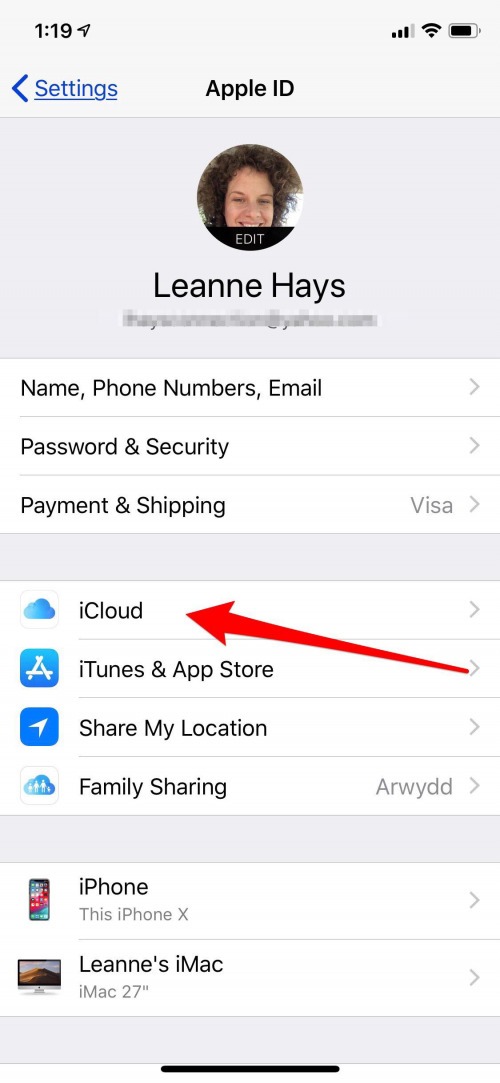
Tap iCloud.
Choose Photos.
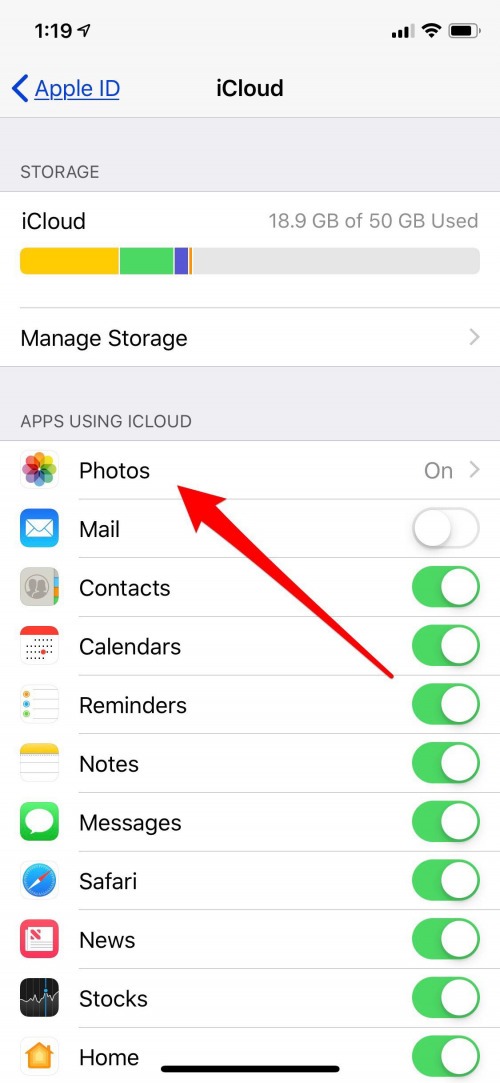
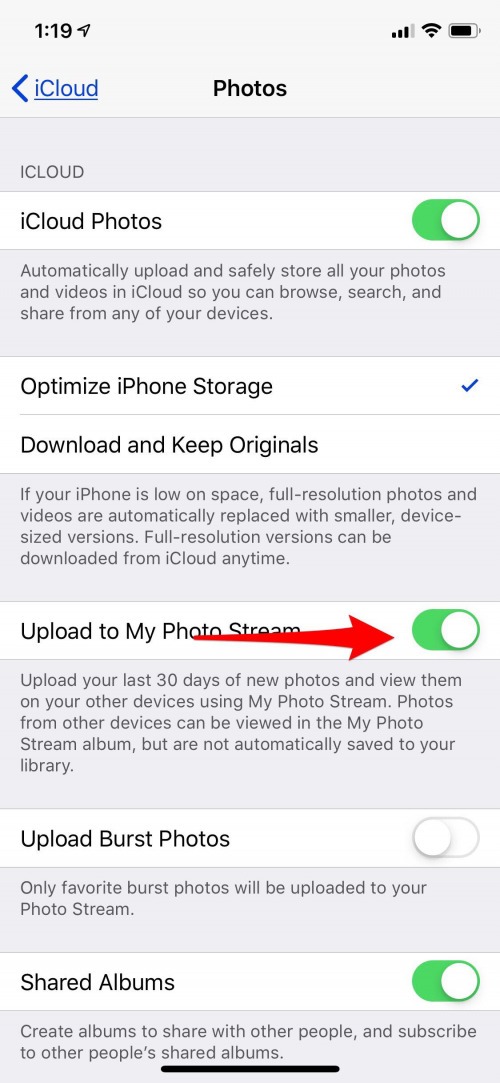
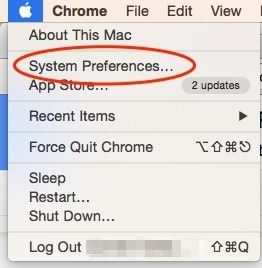
On your computer, open System Preferences from the Apple menu at the top. If you’re on a PC, click here to download iCloud for Windows.
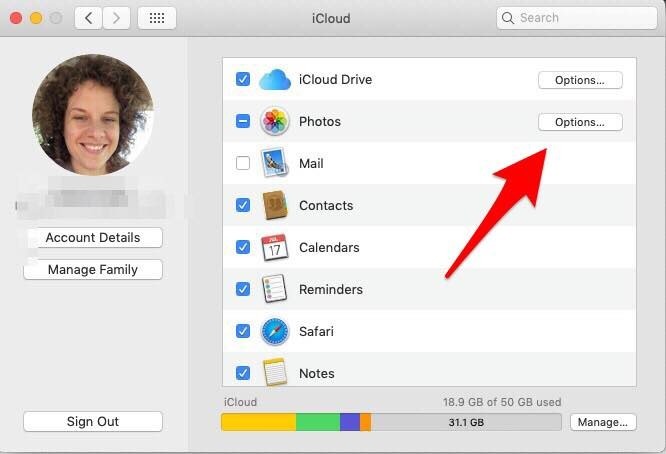
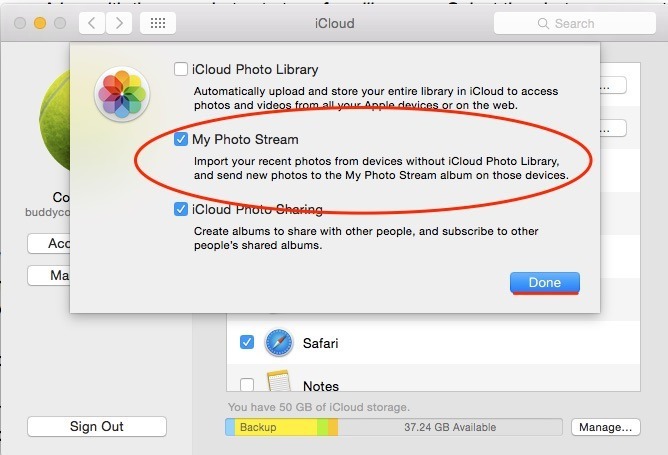
Photos will automatically be added to Photo Stream when you’re in a Wi-Fi zone. But remember, pictures remain in Photo Stream for 30 days or up to 1000 images. To set it up so that your Photo Stream images automatically download to your Mac or PC:
Open the Photos app.
Select Preferences at the very top, under Photos.
Choose General.
Check the box next to Importing: Copy Items to the Photo Library.
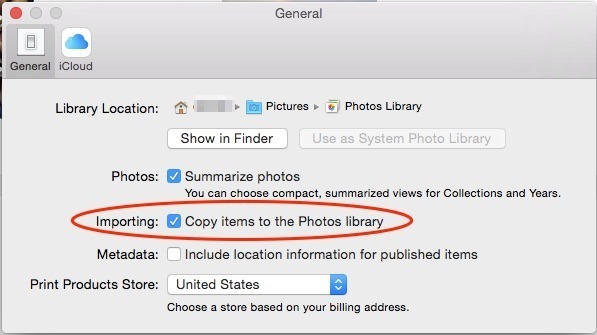
This way, even once photos leave your Photo Stream, they will be saved to your computer. You can also enable iCloud Photo Library on iPhone and computer if you pay for iCloud storage. Doing so will allow you to store your Photos in the Cloud, making them accessible online as well as on your computer.
How to Download Photos from iPhone Using Airdrop on Mac
AirDrop uses Wi-Fi to transfer files from your iPhone to your Mac and vice versa, which means first you need to be sure both your iPhone or iPad and computer are connected to Wi-Fi. Remember that Airdrop also requires a 2012 or later Mac model running OS X Yosemite or later to transfer files between your Mac and iPhone or iPad. To send files from your iPhone to your Mac using AirDrop:
Open the Photos app on your iPhone.
Select the photos you want to transfer to computer. Tap the Share icon.
You’ll see AirDrop at the top of the Share menu.
Choose your computer’s name.


If your computer is not using the same iCloud account as the iPhone you are sending files from, you will need to click Save when the file arrives on your computer. If you are using the same iCloud account, the pictures will automatically save. Need more methods for downloading your pictures to computer? Here’s three more you can use to transfer photos from iPhone to computer.
Related: How to View Burst Photos on iPhone
Top Image Credit: Worawee Meepian / Shutterstock

